How To Brew Beer At Home
It may come as a surprise to you that every single beer in the world no matter whether it's a wheat beer, pale ale, IPA, dark ale, stout, porter or lager, have the same four basic ingredients. Click through here for more on this story !
So, it may come as a surprise to many of you that every single beer in the world no matter whether it's a wheat beer, pale ale, IPA, dark ale, stout, porter or lager, it has the same four basic ingredients.
When you make your own there is just four ingredients that you have to worry about:
Malt which is your brewing sugar derived from malted barley. It influences colour, flavour body as well as alcohol content in beer.
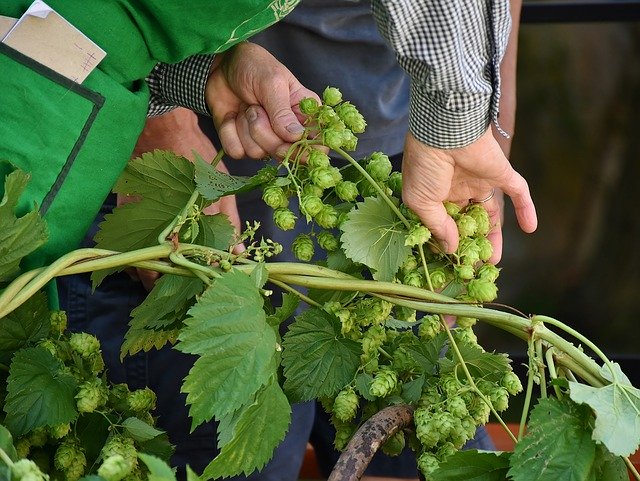
Hops, to supply bitterness flavour and aroma. Hops also act as a natural preservative extending the life off the brew and enhance the aging process.
Brewing yeast required for fermentation which turns the wort into beer and influences the beer style as well as character and flavour. It is crucial to always brew with a high-quality Brewing yeast.
Water fortunately in Australia our water quality is ideal for brewing and producing very good beer. That's it that is all that is required to make a batch of beer.
So, I'm going to demonstrate how simple it is to brew. Even today when we're social distancing, I'm outside and I'm brewing and it's pretty easy.
How to Start the Brewing Process:
Sanitise
All Brewing Equipment before beginning. This is a simple process just give your equipment a light rinse with a Brew Sanitser.. It evaporates the oxygen, so bugs won't reproduce and infect your beer.
Begin by Adding Ingredients
I've got to get some warm water from the Jug here. I'm going to boil it and then I’m going to start putting the ingredients into the fermenter.
Prepare Hops
First thing I'm going to do is I'm going to prepare my hops. I'm making what we call the hop tea and all I'm going to do is pour boiling water on top of those hops. I'm going to let it steep for about 15 minutes before I put it into my fermenter.
Add Malt
So the next part of the process is I'm going to start adding my malt to the fermenter. Now. I do need some warm water to help dissolve these malts. So, what I'm going to do is I'm going to pour some hot water into the fermenter. Just a quick check, always make sure your tap is off. That's a common mistake made by Brewers. Then we're going to add our malt. Malt extract derived from malted barley is a brewing sugar made up of mainly maltose. That is the core ingredient which makes the alcohol in the beer. It also gives the beer body and color.
Add Hops
Okay. So now that I've poured my malts into my fermenter, the next thing I'm going to do is I'm going to pour this hop tea which has been sitting here steeping for about 15 minutes. I'm going to just pour it through a strainer and then rinse it through with water to extract all the wonderful hop flavours. You will note that the hops have become quite powdery and have swollen to about 5 times their original size. All the beautiful flavor will come out of the hops.
Adding Extra Brewing Malt to Make Full-Strength Beer
So the next ingredient for this particular brew, I'm going to put in is 1 kilo of a malt blend. This will bring the beer up to full strength of alcohol at around 5%. Give it a good stir. So this beautiful mixture of hot water malt and hops is all now completely dissolved. I have used about 4 litres of hot water and my next job is to add the cold water and bring it up to 21 liters. Once it starts fermenting, we're going to make our beer
So I’m nearly finishing up to filling up my beer fermenter. So normally most brew instructions say make 23 litres which is around about 60 small bottles of beer. What we like to do with most of our recipes is cut it back a couple of liters of water which down to about 21 litres and you get more flavor and more body into the beer because we're all about the quality of the beer. If you are brewing a rich stout or IPA you may choose to cut that back to 18 litres.
For this brew I'll just top it up to 21 litres. I've got a volume scale on this fermenter which tells me how much water to add and then I'll give it a final stir.
Adding the Yeast
The Brewing yeast is very important that you use a high-quality Brewing yeast. You can't use a regular bread-making yeast. It just won’t work. So in this case, I have I have an American Ale yeast and this is going to produce a beer with clean crisp flavors and it will also get the best flavor out of the malts and the hops.
So the yeast addition is very simple just sprinkle it on top of the dissolved wort. Make sure that the temperature is not too hot so anything below 30 degrees is fine. At this what I’ve prepared is a beer wort and now that if have it will begin fermenting the sugars. Fermentation is a magical process that will create alcohol and produce CO2 transforming this wort into beer.
This is what the wood looks like after you sprinkle the yeast on the surface. It might look like this is sitting on top but it will work all the way through and it cannot be stopped. This little critter is going to eat up all the fermentable sugars until there and more and create the alcohol.
Brewing temperature
One of the crucial things in Brewing is the temperature. It's very easy to keep an eye on temperature. we use a little stick-on thermometer like this which you put it on the side of the fermenter. At the moment this brew is sitting around 22 to 24 degrees.
Let the Fermentation Begin
So this is the final part of preparation for fermentation. We're going to put the lid on the fermenter and ensure it is a completely sealed air-tight vessel. The lid has a little hole for the airlock. Put in your grommet and insert the airlock. Add some water to the airlock to create a one-way vale allowing Co2 to escape. When fermentation begins pressure will build up in the fermenter and it will bubble through the airlock not allowing any oxygen to get back in. It's a one-way traffic very simple and works perfectly. Within a day we are going to see this airlock start bubbling and blooping away.
Now that I've prepared my Brew it's ready to ferment and the easy part about fermenting is you don't need to do anything. The yeast will do it all for you. All you have to do is make sure it's brewing at the right temperature. Another reassuring sign of fermentation is a bubbly foamy surface which will start climbing the walls of your fermenter.
Testing with a Hydrometer
So now that I have my sample in the test tube, it's giving me an initial reading so it is telling me that it's going to produce around about a 5% alcohol beer. It's measuring the wort density, effectively the sugar levels. Note at the end of fermentation the reading will be lower and once that reading stabilises as it is is time to bottle.
Almost Finished Brewing
Towards the end of fermentation bubbling in the airlock slows right down. It's time to test using little device like this, which is known as a hydrometer and it measures what we call the sugar level or the Specific Gravity or SG scale. So we get a sample in our test jar and we will float that hydrometer in the beer sample and take a reading. When that level remains stable over 24 hours. It's ready to bottle.
A hydrometer floats in water at around 1000 and beer will always finisher higher typically around 1010 of Lagers and Pales and 1020 and above for heavier beers including stouts and Ipas.
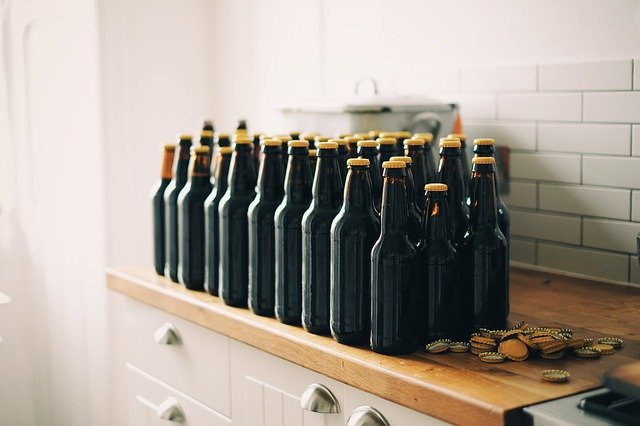
Bottle Carbonation and Secondary Fermentation.
What I have in my hand is what we call carbonation drops and effectively they are little measures of sugar. This is designed to help assist with the secondary fermentation.
So here in the fermenter that's called primary fermentation which is the first stage of fermentation to create your beer. But what you have at the end of that is flat beer. To bottle, simply put the carbonation drops or a measure of sugar in each bottle. Fill up each bottle and cap your bottles using a bottle capper. The bottle is a closed environment so what will happen is that yeast will continue to work but it will work with the new sugar that you put in there and that will create pressure with additional CO2 Within three weeks you've got fully carbonated beer.
Now remember it takes about a week to 10 days in the fermenter, three weeks minimum in the bottle is what we suggest.
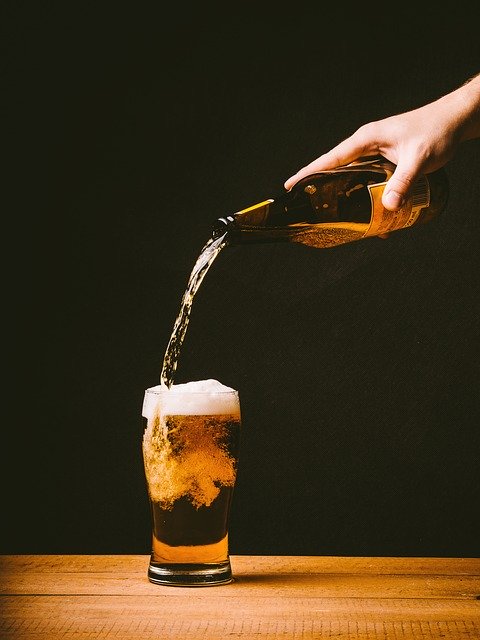
Time to crack a cold one
So within a month you're ready to drink your beer. But remember beer has a best after date which means it will continue to improve with age. After three months of aging you have quite a different beer compared to a three week old beer. Effectively the beer does not go off and that's the end of the Brewing process.
So here's one we made about six months ago or still got a nice bit of carbonation in there. This is the reward for your work. It’s beautiful Amber Beer this one I can smell the malts and the hops.
Cheers!
Outstanding!